A Simple Guide to Creating a Raised Garden Bed
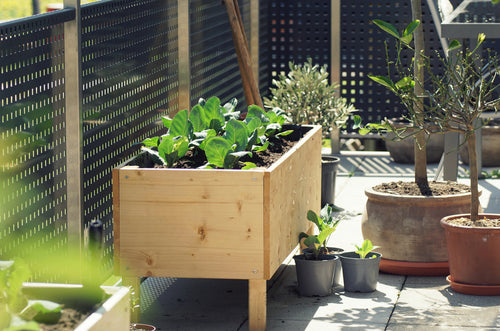
Raised garden beds are a simple and effective way to add style and functionality to your garden.
Not only does this enhance the visual appeal of your space, but raised beds are ideal for gardeners looking to improve soil quality, create better drainage, and have better accessibility to their plants.
So, it’s time to get your tools out and follow along as we walk through the steps to creating raised flower beds.
The Benefits of Raised Garden Beds
Raised garden beds offer a variety of benefits for your garden and plants, including:
- Improved soil quality: Raised beds allow for the use of high-quality soil, allowing you to tailor each bed to the needs of specific plants.
- Easier access: These reduce the need for bending and kneeling, which is ideal for older gardeners or those with mobility issues.
- Better drainage: Enhanced drainage prevents water-logging, ideal for areas with heavy soil.
- Extended growing season: Raised beds warm up faster in spring, allowing you to plant earlier and harvest later.
- Effective weed control: Raised beds can minimise weed growth as they can be filled with clean, weed-free soil.
Materials and Tools You Will Need
Before diving into the process, you will need to gather the following:
- Timber
- Soil and compost
- Organic matter
- Measuring tape
- Spirit level
- Saw
- Drill or screwdriver
- Screws or nails
- Spade
- Rubber mallet
- String and canes
PPE: Always ensure to wear gloves and safety glasses when working with machinery and heavy equipment.
A Step-by-Step Guide to Creating a Raised Garden Bed
1. Choose Your Location
Plants need plenty of sunlight to grow, so choose an area in your garden that receives the most direct sunlight year-round, such as a south-facing location.
Avoid low-lying areas where water tends to pool after rain and select flat ground to ensure even water distribution. Placing your beds next to a garden shed is ideal, as the structure will shield your plants from harsh winds.
2. Plan and Measure
Careful planning and measuring are necessary to ensure a functional garden space.
When building your raised beds, aim for a width of 3 to 4 feet and a height of 12 to 18 inches for vegetables. Aim for a higher bed for easier access to your plants. You can choose a length that is perfect for you, however, opt for smaller beds if you have limited space.
Use stakes to mark your chosen location and measure the wood with your measuring tape. Use a handsaw or power saw to cut your measurements precisely.
If you’re creating multiple raised beds, leave a pathway at least 2 to 3 feet wide for easy manoeuvrability.
3. Prepare the Ground
Remove any weeds and grass from the areas you have chosen for your raised beds. You can use a spade to cut and lift the turf.
Use a spirit level to check if the floor is level. If not, add and remove soil until the ground is flat enough for the installation. Use a tamper tool to lightly compact the soil for a firm base.
If you are building on a hard surface such as concrete or your soil has poor drainage, add a layer of coarse sand or gravel at the bottom of the bed. This will allow any water to escape to prevent rot and other water-related problems.
You can also lay down landscape fabric, cardboard, or paper on the ground to act as a weird barrier underneath your raised bed.
4. Construct the Frame
Choose a wood such as redwood, treated pine, or cedar for your raised bed frame.
Measure the lengths for the side of your bed using a tape measure and mark your measurements with a pencil. Then, use a handsaw or power saw to cut along these lines to create your boards.
Once all the pieces have been cut, lay out the pieces into your desired shape and drill pilot holes into the wood to prevent splitting. Then, use a drill to drive screws into the ends of the boards into the adjoining pieces.
For added strength, hammer wooden stakes into the ground at each corner and along the sides. Use screws or nails to fasten the frame's sides to these stakes.
5. Fill the Bed
Once your frame has been constructed, add a base layer of gravel or small stones to your raised beds around 2 to 3 inches deep.
This helps excess water to drain away from plant roots, preventing waterlogging and promoting healthy growth. Then, fill the bed with soil, compost, or organic matter, depending on your preferences.
For vegetables, opt for a soil depth of at least 12 inches. If you’re planting shallow-rooted plants, aim for a depth of 6 to 8 inches. Then, water the soil thoroughly to help it settle and eliminate air pockets.
Use a rake to level the surface of the soil and add a layer of mulch to suppress weeds and improve the appearance of your raised beds.
6. Plant and Maintain
Decide whether you want to plant herbs, flowers, vegetables, or a mix of all.
Raised beds are ideal for tomatoes, lettuce, peppers, basil, parsley, marigolds, sunflowers and much more!
Ensure you space each plant slightly apart for healthy growth and follow the guidelines for each plant when planting seeds.
Uplift Your Garden with Atlas Sheds
At Atlas Sheds, we’re committed to helping you create the garden of your dreams.
That’s why we provide high-quality timber sheds to homes across the UK.
From storage sheds to potting sheds, we can help you expand the functionality and appeal of your garden.